|
On this page I'll list previous issues of my e-zine. Here's an example of the format I might use.
This site is designed to assit the residents
of the Brainerd Community,located on the southwest side of Chicago, as well as anyone who is interested in understanding their
computer and how it works. The site is designed for those of us who are tech challenged and will provide articles,software
and hardware information with links to other sites which can provide assistance in gaining a complete knowledge and insight
into technology. Along with brief tutorials for OS and hardware installation. It will also give examples of problems and fixes
for keeping your system up to date. Their will be articles on security and viruses. Their will be links to sites that provide
alternative programs for optimizing and repairing your system. their will be links to sites for purchasing hardware and siftware
that you can use for customizing your sytem. This site will also encourage you to ask question about your system and attempt
to provide solutions to problems that may arise. If you have questions feel free to ask by sending your questions to us for
review. This site will also have links for fun and games,artwork, photos,information on movies, and music There will be a
page for reviews for any topic from contributors. .
All are invited to log on and send in your articles, comments and tips.
At this time we are seeking sponsorship and
donations to help maintain this site.
This a trail run to check the response of the
public.
You sometimes we have a little trouble with internet explorer here's some tips on what to do if that problem occurs
Repair Internet Explorer
If you want to repair Internet Explorer, you would normally go to Add/Remove Programs in the Control Panel, choose the
listing for Microsoft Internet Explorer and press Change/Remove. This would bring up a Window where you could select to repair
Internet Explorer.
Internet Explorer is listed in the Add/Remove Windows Components part of Add/Remove Programs, but you can only remove
access to Internet Explorer from the Start menu and Desktop.
The only way to repair Internet Explorer is to have sfc check the system files by running the command sfc /scannow from
the Command Window (Start > Run > cmd).
Windows File Protection
If a repair doesn't do the trick, you can try a reinstall:
1. Start the Registry Editor
2. Go to HKEY_LOCAL_MACHINE \ SOFTWARE \ Microsoft \ Active Setup \ Installed Components \ {89820200-ECBD-11cf-8B85-00AA005B4383}
3. right-click the IsInstalled value, and then click Modify
4. Change the value data, from 1 to 0
5. Close the registry editor
6. Download and install Internet Explorer 6.
The above will let you reinstall the Internet Explorer 6 browser component. To reinstall Outlook Express 6, change the
IsInstalled value from the following registry key: HKEY_LOCAL_MACHINE \ SOFTWARE \ Microsoft \ Active Setup \ Installed Components
\ {44BBA840-CC51-11CF-AAFA-00AA00B6015C}
Note: You need to be logged on as an administrator to be able to change these registry keys.
Make Google Internet Explorer's Primary Search Engine
When you want to search for something on the Internet, you'd normally navigate to a search engine using Internet Explorer.
But you can also just type your query into Internet Explorer's Address bar, and press the Enter key.
Internet Explorer's Address bar search
By default, Internet Explorer will use Microsoft's MSN search engine to execute your search. Since Google is the favorite
search engine of many people, here is how to change Internet Explorer's preference from MSN to Google:
1. Start the Registry Editor
2. Go to HKEY_CURRENT_USER \ Software \ Microsoft \ Internet Explorer \ Main
3. Double-click the Search Page value, and in the Value data box enter http://www.google.com (overwriting the existing
entry)
4. Select New > String Value from the Edit menu
5. Name the new value Search Bar
6. Double-click the Search Bar value, and in the Value data box enter http://www.google.com/ie
7. Go to HKEY_CURRENT_USER \ Software \ Microsoft \ Internet Explorer \ SearchURL
8. Double-click the (Default) value, and in the Value data box enter http://www.google.com/keyword/%s
9. Select the key HKEY_LOCAL_MACHINE \ SOFTWARE \ Microsoft \ Internet Explorer
10. Select New > Key from the Edit menu
11. Name the new key Search
12. With the Search key selected, Select Select New > String Value from the Edit menu
13. Name the new value SearchAssistant
14. Double-click the SearchAssistant value, and in the Value data box enter http://www.google.com/ie
15. Close the registry editor
Note: For this to work, make sure that Do not search from the Address bar is not selected on the Advanced tab from Tools
> Internet Options.
FYI>. You know sometimes I get tired of playing with that little mouse and get stiff muscles as well. So here are a few
tips that you can use in using the keyboard to navigate instead of that little bugger. Most of us tend to use the little creature
when logging on to our computer, but by using the { TAB } key you can just as easily go from field to field and by hitting
{ ENTER } it will activate the default button which in this case is OK.
There are loads of keyboard shortcuts, many which are listed on the WEB or in your applications. You can find them in
your pull down menu of your applications or in your manuals for your computer. I know these list can be long and bothersome,
but take time to learn them if you plan to use your computer constantly they will save time and frustration.
Here some basic Keyboard shortcuts:
_______________________________________________________
Move Between items in the active area: Arrow Keys
Move Between different fields or control: { TAB
Move Between different parts of the screen: { F6 }
Move Between forward thruogh tabs: { Ctrl}{TAB}
Move Between active applications: {Alt}{TAB}
______________________________________________________
Using the {Windows}_key:
Shows the Desktop:
{Windows}D {Win 98/ME/2000/XP}
{Windows}M (Win 95/NT}
Opens My Computer with Windows Explorer: {Windows}E
Opens the Search dialog box: {Windows}F
Opens the Run dialog box: {Windows}R
Opens the system Properties window: {Windows}{Pause/Break}
( For those who do not know the {Windows}{Pause/Break} keys check your users manual or go to {Microsoft.com}
___________________________________________________________
For those pesky popups everybody hates you can use adware and popup blockers also to eliminate them the shortcut that
is handy is {Alt}F4} clicking this will close the active ap[plication if no application is running it's the same as Start/Shutdown
Exiting Windows. Exiting was never so easy.
Systweak
I found a little program that is great for optimizing your system. It is known as Advanced System Optimizer or ASO for
short by Systweak.. This utility has all the things you would need to maintain system upkeep and tweak the performance of
your registry, files, and create backups. Its tools are extensive and afford you the opportunity to select what you wish to
keep or discard. There are several built in tools to play around with and allow you to make adjustments where needed. You
can customize your system to your liking with it windows tools and maintain privacy and security, as optimize your internet
connections. This tool allows you to clean and fix your registry and files as well restore files you may have deleted. It
will analyze and provide advice so you can receive the best performance from your system. I recommend you try this utility
for yourself. You can download a free trial for 30 days and give it a shot.
click here to download file
Overclocking
From Wikipedia, the free encyclopedia.
Overclocking is the practice of making a component run at a higher clock speed than the manufacturer's specification.
The idea is to increase performance for free or to exceed current performance limits, but this may come at the cost of stability.
Overclocking is mostly practiced by PC enthusiasts in order to squeeze the most performance out of their machines. Some
enthusiasts will do this so they can buy a lower-end system, overclock it, and achieve the performance of a higher-end system.
However, the cost of an adequate cooling system, and often even the cost of choice overclocking components results in a base
of overclockers who mostly overclock as a hobby, or as a 'sport' of sorts - always striving for more speed.
Many enthusiasts will purchase high-end components to begin with, and then overclock them to achieve even more performance.
The fastest home computers in the world are overclocked, and a stock (running at manufacturer's specifications) system is
often no match for an overclocked one.
Table of contents [showhide]
1 Considerations for Overclocking
2 Advantages with Overclocking
3 Disadvantages with Overclocking
4 Overclockers
5 External links
6 See also
Considerations for Overclocking
The main aspect of overclocking is the need for more effective cooling than that of the inefficient air-based cooling
systems which come packaged with typical CPUs and graphics cards. High-end, specially-designed, copper heatsinks are often
used with powerful fans for better cooling. Liquid (usually water) cooling is another popular method, which uses liquid as
a coolant because it is more efficient conductor of heat than air is. Instability is a major danger of overclocking, although
most overclockers take some precautions to check their systems for stability. The process of stress-testing a system is often
called burn-in, and it is common to run several applications simultaneously or special burn-in application that place a high
load on the component being tested.
Commonly overclocked components include: CPUs, video cards, motherboard chipsets, and RAM. Methods that have been used
to cool overclocked components include: forced convection (a fan blowing onto a surface); liquid cooling (liquid carries waste
heat to a radiator, similar to how automobile engines are cooled); liquid nitrogen (perhaps the most dangerous method); phase
change cooling (as used in refrigerators; and submersion (placing the entire computer in an inert fluid). Liquid nitrogen
is a temporary cooling measure in most cases, as a computer cannot provide sufficient power to a cooling device keep it in
a liquid state at normal room temperatures. Because of this, liquid nitrogen is used as an extreme measure to set records
rather than to cool a system for a normal period of use. Of the aforementioned methods, air cooling, liquid cooling, and phase
cooling are the most popular, due to their efficiency, availability, and affordablity.
Overclocking arises in part due to the economics of the manufacturing processes of CPUs. In most cases, CPUs with different
rated clock speeds are manufactured via exactly the same process. A batch of CPUs may be tested and binned--that batch is
set to operate at a specific frequency because all of the processors function at that clockspeed. The clock speed that the
CPU is marketed under is the speed at which the CPU has been tested to operate consistently well, but often there is a distribution
where on one end there are the CPUs which are near their physical limit at the specified clockspeed and on the other end there
are CPUs which can operate at frequencies substantially higher than their specifications. With proper power and cooling, slower
CPUs can be made to run at the same speed, or faster, than similar CPUs with higher stock clockspeeds. There is a commonly
held view that overclocking results in system instability, which is not the case when performed correctly.
In addition, there have been situations in which a chip manufacturer will deliberately underrate a chip in response to
market pressure. This results in an inexpensive component, which (with a little bit of voltage) is easily overclocked to match
the speed of a more expensive component. The best modern example of this would be the AMD AthlonXP 2500+ (codename Barton)
processor, which is easily overclocked to match the speed of the AMD AthlonXP 3200+, a processor four times more expensive.
Advantages with Overclocking
You could, in theory, purchase a slower processor for a cheaper price and overclock it to the speed of a more expensive
processor.
Faster performance in games and applications for "free".
Overclocking can be an engaging hobby in itself and supports serveral dedicated online comunities.
Disadvantages with Overclocking
Increasing the clock speed and/or voltage of a component can shorten its lifespan or possibly damage its circuitry.
Increasing the clock speed of a component increases its power consumption or electrical "workload", which usually
means a rise in temperature. If the temperature rises too high the component can fail. In some situations, the rise in power
consumption may be a problem.
More common than hardware damage is the computer crashing, but able to reboot after being left to cool for a short time.
Although the hardware is not permanently damaged, this is inconvenient and could cause loss of important data. In rare, extreme
cases entire filesystem failure may occur, causing the loss of all data. The risk of loosing data can be lessened against
by using a journaling filesystem or redundant storage, but not completely removed.
Not every component of a computer is overclockable, for example hard drive platters cannot be made to spin any faster.
Where hard drive read/write rate is the bottleneck, as it is for many processes, overclocking will bring little or no speed
advantage.
Personal computers are mostly used for tasks which do not push the hardware, or where the speed of a task is restricted
by 'bottlenecks' outside of the local machine. For example, web browsing does not require a very fast computer, and the limiting
factor will almost certainly be the speed of the internet connection. Other general office tasks such as word processing and
sending email are more dependant on the efficiency of the operator than speed of the hardware. In these situation any speed
increases through overclocking are unlikely to be noticeable.
It is generally accepted that, even for computationally heavy tasks, speed increases of less than ten percent are difficult
to discern. In video gaming, for example, most people would not notice a jump from 60fps to 66fps without the aid of an on-screen
frame counter. Generally, gains of a few percent are sought for prestige rather than real-world computational benefit.
Products sold specifically for overclocking are sometimes little more than computer decoration. Although this is not a
bad thing in itself, buyers should be aware of the FUD surrounding some products. Examples include heat spreaders and sinks
designed for chips which do not generate a problematic ammount of heat.
Overclockers
An overclocker is generally defined as someone who overclocks his or her computer. The term overclocker has grown to include
a wider group of people. Overclocking is still a very prolific hobby. With cooling methods becoming more and more advanced
and with inexpensive microprocessors being produced with the same core circuitry as faster microprocessors of the same series,
a large number of do-it-yourself computer builders overclock to some extent.
External links
Some web sites that provide information on overclocking or serve as a community for overclockers include:
[Overclock.net (http://www.overclock.net)]
[Overclocking.net (http://www.overclocking.net)]
[Hard|OCP (http://www.hardocp.com)]
[Anandtech (http://www.anandtech.com)]
[Overclockers.com (http://www.overclockers.com/)]
[OCWorkBench (http://www.ocworkbench.com/index.stm)]
[edit]
See also
CPU locking
Front side bus
Underclocking
OverDrive
CPU cooling
PC motherboard
Overvolting
Computer cooling
Retrieved from "http://en.wikipedia.org/wiki/Overclocking"
Categories: Computer hardware
This page was last modified 21:22, 14 Sep 2004.
All text is available under the terms of the GNU Free Documentation License (see Copyrights for details).
Wikipedia
As you become more familiar with your system you may want to increase the memory so you can do more with different programs
such as graphics,video and music. Some systems are not equipt to handle large files so increasing your memory is a good idea.
Here's a tip to help you do just that.
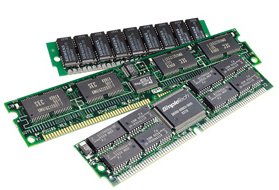
Installing MemoryCategory: HOME /
MemoryDate: March 25, 2001
Author: David Risley
Type: Not specified Memory installation is a pretty easy upgrade to perform. Most of the work, if you could call it that,
comes before you actually do the upgrade - in being sure you get the right kind of memory for your system.
For the purposes of this tutorial, we will assume you have already done this.We will break the tutorial up for the different
types of memory. SIMMs (EDO) First some info, though. Your computer, if it uses 30-pin or 72-pin SIMMs, organizes its SIMM
sockets into groups called banks. Some boards say that two sockets make a bank. Some say that one is a bank. Nevertheless,
a bank must be full. A half full bank will drive your computer nuts. Also, you can't mix two different kinds of memory in
a single bank. For example, you can't put a 4MB SIMM and an 8MB SIMM in one bank and expect to get 12 MB of RAM. Also, many
systems require you to put the memory in in pairs.
Therefore, if you want 32 megs of RAM, you have to stick 2 16's in instead of one 32. Here's a shortcut which is
almost always true. An older computer with a 386 or an early 486 chip usually has a 4 socket bank of 30-pin SIMM modules.
A later model 486 requires only one socket of 72-pin modules.
Pentium machines have two socket banks of 72 pin modules, meaning you must install RAM in pairs. In all of these systems,
the bank must be full for your system to operate. Following these guidelines, lets say you want to add 16 meg of RAM to your
Pentium machine. You could buy one 16MB SIMM, but this won't work because you will have a partially filled bank. You must
buy two 8MB SIMMS instead, and install them in a pair.
1. Turn off the computer, unplug it, and take off the case cover.
2. Locate the memory slots.
3. Remove the old memory (if applicable). This will entail loosening the little retainer springs on each end of the memory
socket until the memory stick can be removed.
4. Install the RAM. To do this, first locate the little notch on the pin-side of the module. This notch will line up with
a notch on the memory socket itself, to ensure proper alignment. Position the module over the slot at a 45-degree angle with
the module pins in the slot. Gently rotate the SIMM until it is in an upright position. When it is in an upright position,
the retainer springs will snap into place and secure the SIM
5. Repeat previous step for all remaining SIMMs you wish to install.
6. Test it. Before you put your case back on, power on your system and make sure it correctly tallies the RAM.
7. Close up the case.DIMMs (SDRAM, DDR-DRAM) Now, we can all thank God that SDRAM and DDR came out, or we'd all have to
decipher all that bank stuff in order to upgrade memory. DIMMs are much simpler.
Most motherboards have the 168-pin slots for SDRAM or 184-pin slots for DDR-DRAM. Each DIMM slot is a bank, so one can
install these types of memory in any combination they want. It is best, if you have several open DIMM slots, to use the lowest
number slots first. The slots are numbered, such as DIMM 0, DIMM 1, and DIMM 2. Choose the lesser, unused number. If this
is the only module in the system, use DIMM 0. Some older motherboards have both SIMM and DIMM slots. On these, each DIMM slot
is a bank, just like normal. The SIMM slots right next to them are usually paired in a bank, just like the normal Pentium
bank setup.
1. Turn off the computer, unplug it, and take off the case cover.
2. Locate the memory slots.
3. Remove the old memory (if applicable). This will entail pressing down on the little ejector clips on each end of the
memory socket until the memory stick pops out of the socket. Then you just life it out.
4. Install the RAM. To do this, first locate the little notches on the pin-side of the module. These notches (usually
two) will line up with keys on the memory socket itself, to ensure proper alignment. With the ejector clips in the open position,
position the module over the slot and begin pressing the module down into the slot. You will need to press down pretty hard.
As you press down, the module will sink into place and the ejector clips will close themselves to lock the module into place.
5. Repeat previous step for all remaining DIMMs you wish to install.
6. Test it. Before you put your case back on, power on your system and make sure it correctly tallies the RAM.
7. Close up the case.
For more info on keyboard shortcuts go to
|